THE CLIMBCUT GUIDE
Climbing videos,
from recording to sharing.
From bouldering to lead, follow real app screens to record, organize and edit your climbing videos.
What would you like to capture?
Whether filming on your own or picking a send from several attempts, start with the guide you need.
Climbing filming guide: record videos on your own
Capture the starting holds and the final move: check your framing and recording status before you climb.
Read the guide →GUIDE 02How to trim a bouldering video
Cut the wait before the climb and the walk back to your phone. Keep the attempt you want to share.
Read the guide →GUIDE 03How to edit climbing videos for Reels and Shorts
The same climb can need a different frame. Choose the ratio, then check that your hands and feet stay in view.
Read the guide →GUIDE 04How to organize climbing videos by grade
Find your attempts more easily. Save the grade with the video and choose how its badge appears.
Read the guide →Choose your recording frame and export ratio separately.
When recording a climb, frame your hands and feet from the start to the final hold. The camera ratio guide helps with composition; it does not crop the original recording.
Review climbing videos in your library and trim the parts you want to keep. For Reels or Shorts, choose the aspect ratio and fit or fill in the editor, then export a separate MP4.
Before sharing, play the export and check its start and end, framing of hands and feet, grade badge and audio.
STEP 01
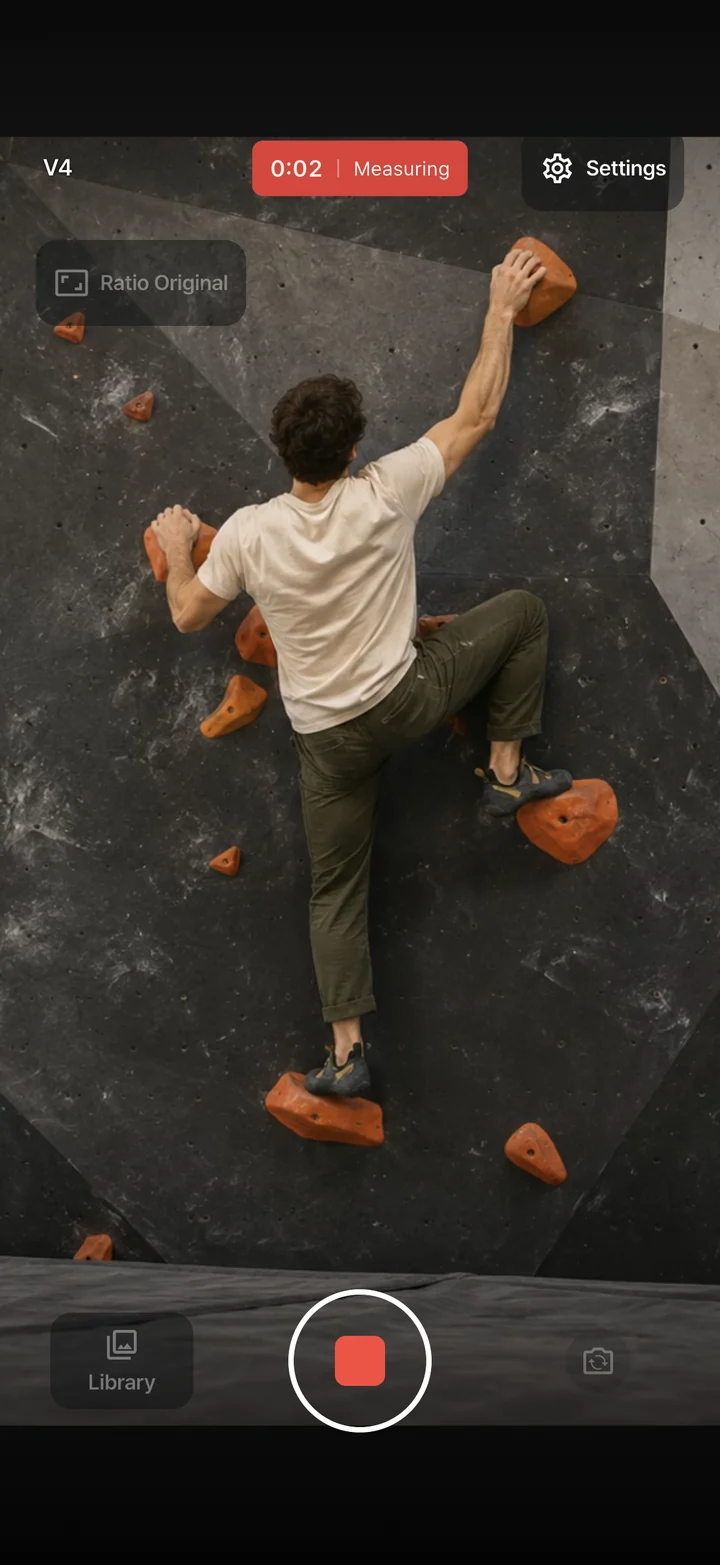
Get ready to record.
Open the app
Allow camera and microphone access. New recordings include audio. Recording starts only when you tap the record button.
Save the grade
Tap the grade at the top left, then choose the discipline, grading system and grade. You can also select the hold color separately.
Frame the climb
Use the ratio button on the recording screen to preview your framing. Before recording, use zoom buttons, dragging or pinching to adjust the view. Tap a point to request focus and adjust exposure if needed.
Check the preview
If the blur hint appears, check for an obstruction, dust or fingerprints on the lens. The hint runs only before recording and can be turned off in recording settings.
Record and check
Tap record to start and tap again to stop. After saving finishes, open the library and check playback.
STEP 02
Your attempts, together.
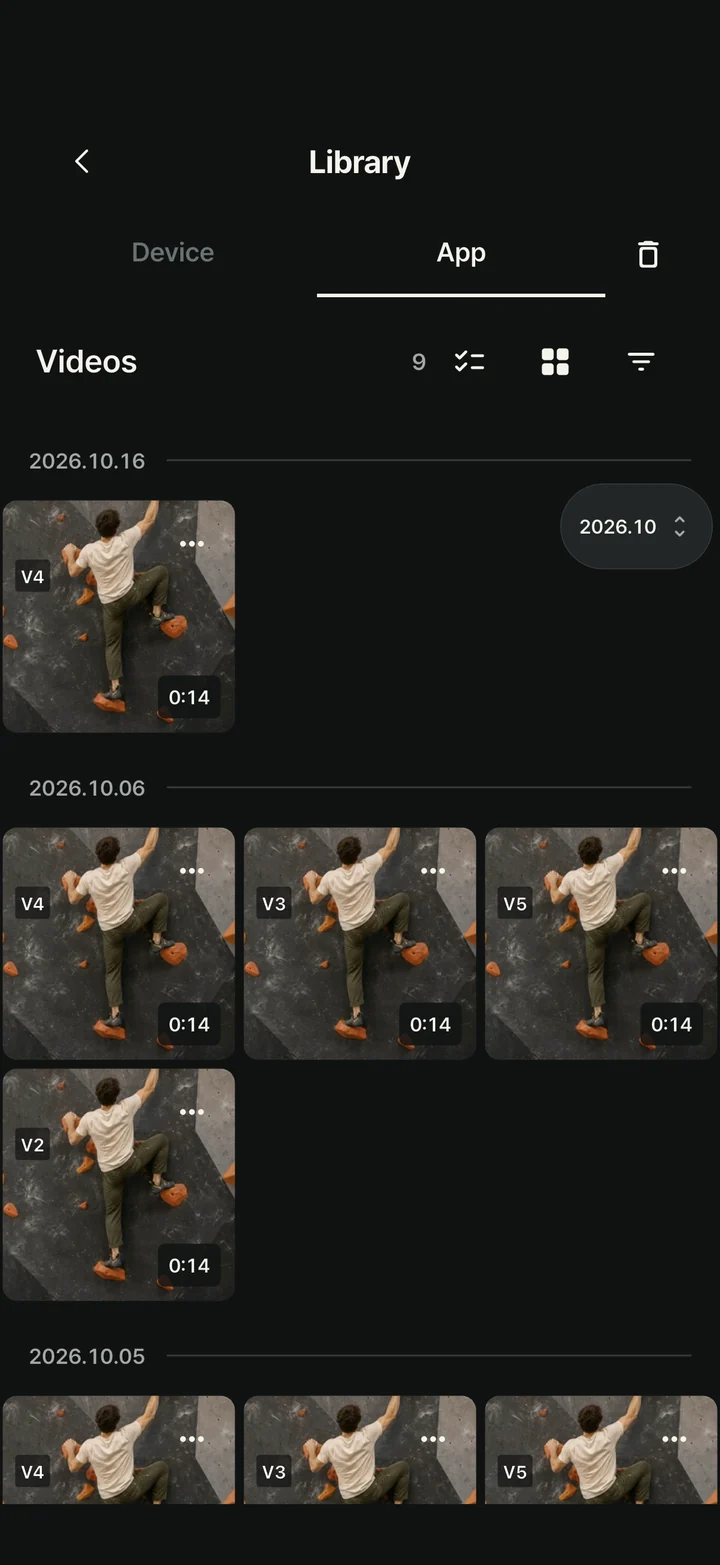
Open the library
Tap Library at the bottom left of the recording screen and open App Folder for your recordings. Choose Grid, List, Large or No thumbnails view.
Find the right video
Combine discipline, grade, recording preset and result filters while browsing by date. You can also find records with no assigned value.
Manage several videos
Tap Select or long-press a video. Assign a gym or grade to selected videos, or export them in sequence.
Delete and restore
Move a video to Trash from its menu. If you deleted it by mistake, restore it from the library's Trash. You can restore several videos together.
Free storage
Check duration and file size in List view. Videos must also be permanently deleted from Trash to free their storage. Check what you want to keep first.
STEP 03
Keep the best part.
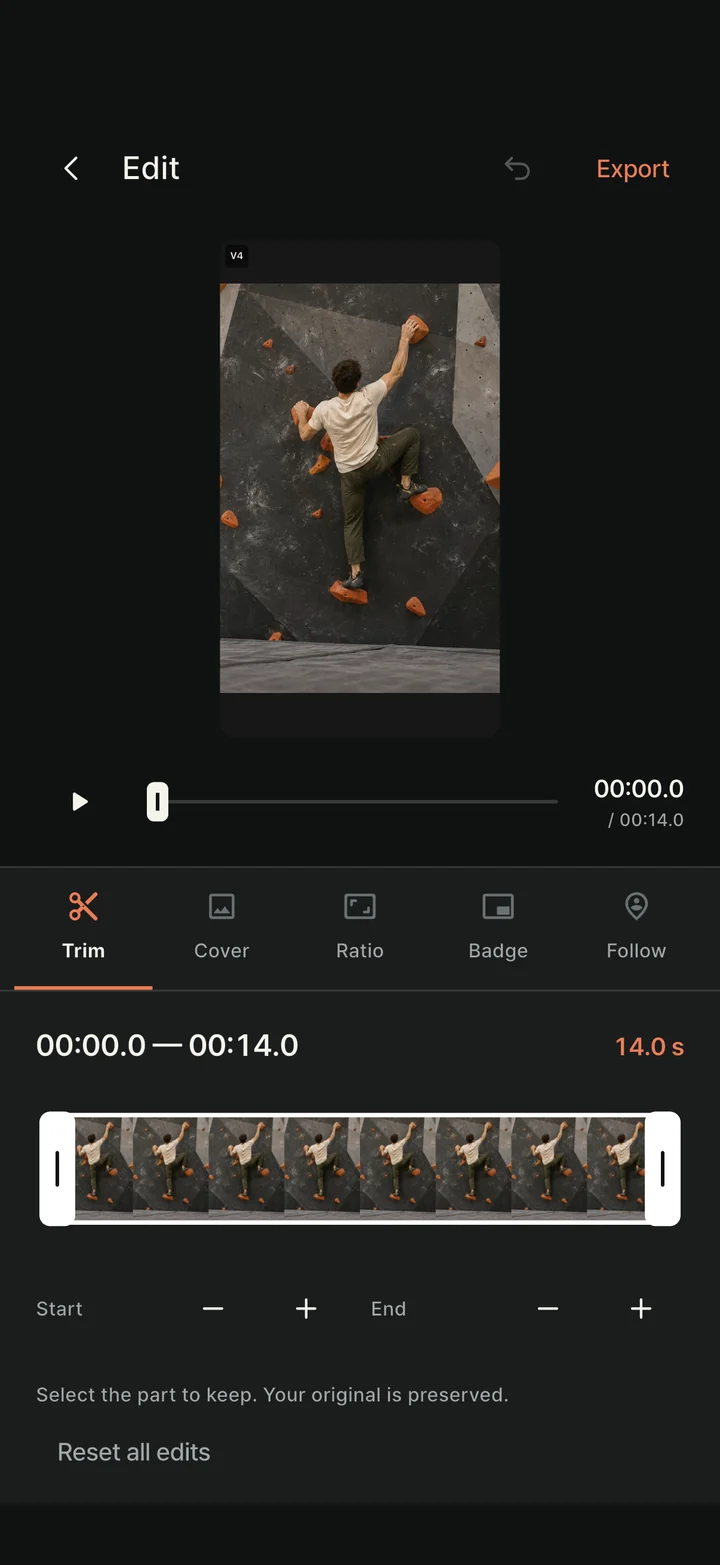
Start editing
Choose Edit video from the video menu, or Edit on the playback screen. Set the start and end with the timeline handles, then fine-tune them.
Cover and framing
Choose a frame for the library cover. In Ratio, select Fit or Fill and adjust zoom and position to frame your video.
Adjust the grade badge
New graded recordings automatically have a thumbnail badge. In Cover or Badge, choose Rounded, Pill or Text only, set its position and size, and toggle Show watermark. Grade filters still work when the badge is hidden.
Keep your edits
Saving and closing retains the editing settings. Editing does not overwrite the original recording.
STEP 04
Check, export and share.
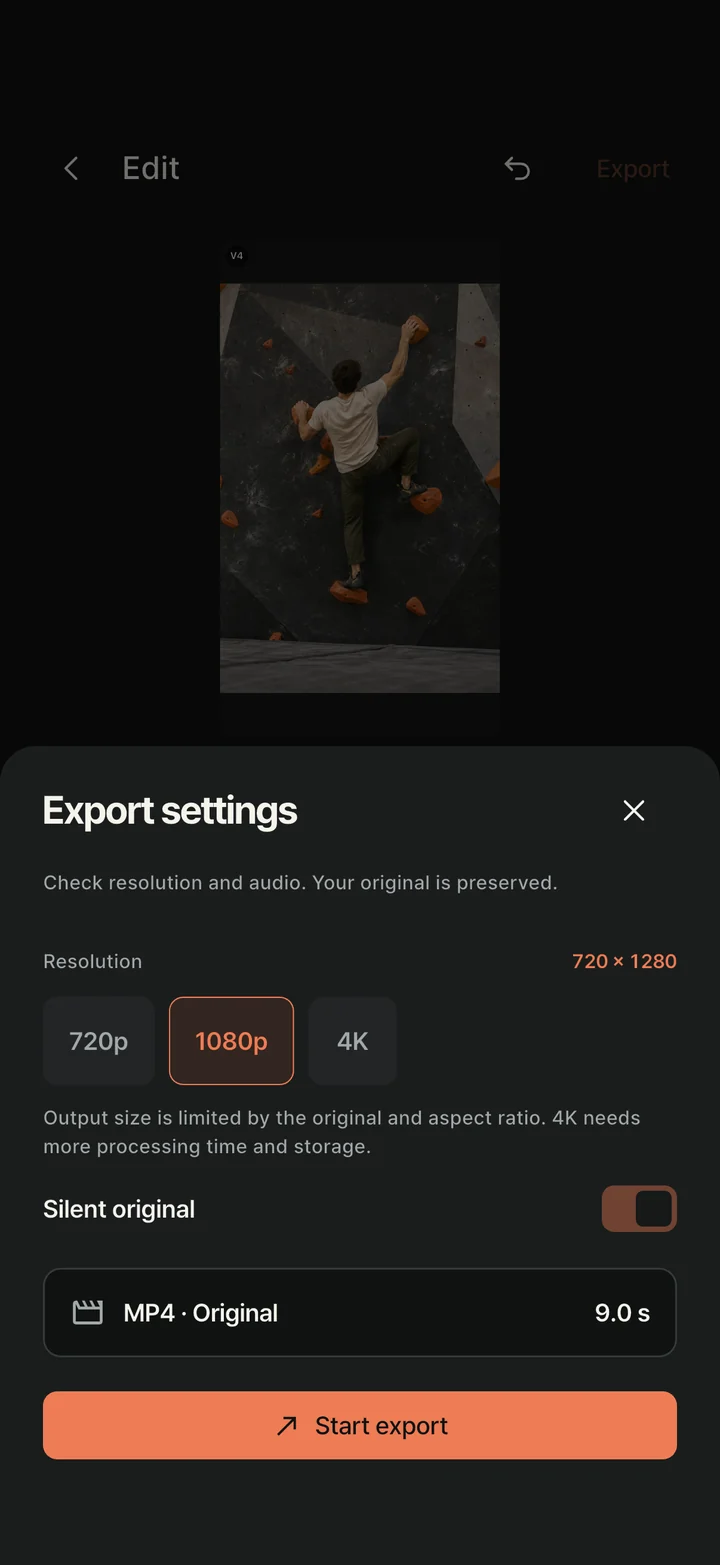
Export settings
Tap Export at the top of the editor to open the final settings. Check resolution and audio. Keep the original sound or export a muted edit.
Create the edited file
Tap Start export to create the file. Keep the app open until it finishes, then check the result. You can retry failed or interrupted exports.
Save or share
Play the result, then save it to Files or send it through the device's share sheet. Check the cover and audience in the destination social app.
Keep important recordings
An exported edit is not a complete backup of the original and all editing settings. Save what you need separately before deleting the app.